Showing posts with label To Teachers. Show all posts

Saturday, 11 April 2020

Utility of Various Display Board in Classroom Teaching,

1.BLACK – BOARD/CHALKBOARD

               Chalkboards, perhaps the most important visual aid for teaching mathematics. It is the most indispensable tool in the hands of a mathematics teacher. Mathematics cannot be taught effectively without the use of chalkboard. Use of colour chalks can make the blackboard work appealing and attractive. A mathematics teacher can make use of the blackboard for:

Drawing geometrical figures and illustrating construction of geometrical figures.Developing various steps of the solution of a problem or proof of a theorem.Drawing graphs.Writing important points to draw the attention of the students.Interrelating mathematical concepts and principles.Writing problems for assignment and drill.Summarizing the day’s lesson.

                     Black-board is an integral part of the Mathematics classroom. The black-board should be well polished and smooth. It should be black in colour and fit for writing with a chalk. In some places the colour of black-board has now been made green. This has been done because the green colour is useful for eye sight.

Hints on Effective Use of the Chalkboard

1. The chalkboard should be cleaned before using it.

2. The writing on the chalkboard should be neat and legible so that it can be easily understood by the students.

3. The writing on the blackboard should be straight and visible to the entire class.

4. Highlight key concepts with coloured chalk either by underlining or enclosing in boxes.

5. The mathematical figures should be correct and proportionate to the measurements used.

6. While writing on the board, the teacher should keep talking to the students to hold the attention of the class.

7. The teacher can encourage students’ participation by asking them to write or draw on the blackboard.

8. The teacher should take adequate care to see that the writings on the board are accurate and appropriate.

Advantages:-

1. It is used to develop various steps of the solution of a problem (or) proof of the -Orem.

2. It is used for drawing important diagrams.

3. It is used to compare and contrast certain important results. Such are noted down on B.B.

4. Black-board can also be used to plot certain graphs (or) curves showing various inter-relationships, presenting statistical data etc.

2.FLANNEL – BOARD

Flannel board is an excellent device for exhibiting diagrams, geometrical figures, prepared materials, showing interrelationship among various mathematical ideas, sequence of steps in the derivation of a formula or steps in solving problems. Flannel board consists of a piece of flannel stretched tightly over a strong backing of plywood. The items to be depicted on the flannel board should be pasted with small piece of sand paper at its backside so that it can be made to stick on the flannel board.

The flannel board can be used for 

Showing the sequence of steps in the derivation a formula, proof of a theorem and solution of a problem.Rearranging the steps in the proper sequence. Moving certain parts of a geometrical a figures to another position so as to get a new geometrical figure. For example put up a parallelogram ABCD on the flannel board. Cut it along DE

We get the right-angled ∆ ADE. Place it on the other side the parallelogram. We get a rectangle EACD.

This activity is very useful in computing the area of a parallel gram by comparing it with that of a rectangle.

3.BULLETIN BOARD:

The bulletin board is used for displaying bulletins, announcements, and visual displays that are interesting to the students. Bulletin boards are usually made of wood with thick flannel cloth on them and a wooden frame running around it with a glass covering on the front side.

Advantages:-

1. To motivate, arouse curiosity and build enthusiasm in students.

2. To display work done by students.

3. To display graphic and pictorial material linked with the curriculum in an attractive manner.

4.MAGNETIC BOARD

Magnetic board is a modification over the flannel board. Instead of flannel. A metallic sheet is fixed on the plywood. Small magnets are used to hold the materials to be exhibited on the metallic boards. It serves the same purpose as a flannel board does.

5.WHITEBOARD

An interactive whiteboard is an instructional tool that allows computer images to be displayed onto a board using a digital projector. The instructor can then manipulate the elements on the board by using his finger as a mouse, directly on the screen. Items can be dragged, clicked and copied and the lecturer can handwrite notes, which can be transformed into text and saved.

They are a powerful tool in the classroom adding interactivity and collaboration, allowing the integration of media content into the lecture and supporting collaborative learning. Used innovatively they create a wide range of learning opportunities. However, in many environments they are not being used to their full potential, and in many cases acting as glorified blackboards. 

This type of whiteboard is now commonplace in schools in the UK, but universities have been slower to adopt this technology. They were originally developed for use in business to demonstrate concepts and record meetings. However, they are an extremely flexible tool which can be used with both the youngest primary school children and university graduates.

An interactive whiteboard can be a cost saver as this technology demonstrates how one computer can provide learning stimuli for a whole classroom. This is more cost effective than equipping an entire IT room, or every student with a laptop.

Examples of the features available when using an interactive whiteboard:

• Add annotations

• Highlight text

• Add notes and drawings and then save them to be printed out and shared, or added to a virtual learning environment.

• Show pictures and educational videos to the whole lecture theatre. You can label parts or highlight elements of an image.

• Demonstrate the content available on a website in a teacher-directed activity

Interactive whiteboards as a pedagogical tool

This type of tool promotes creative teaching and motivates students into absorbing information.

Teaching with an interactive whiteboard allows lecturers to accommodate all different learning styles:

• Tactile learners get to touch and move things around the board. They can also make notes and highlight elements.

• Visual learners benefit from a clear view of what is happening on the board.

• Audio learners can participate in a class discussion.

Interactive teaching

The teacher can call upon the students to interact with the whiteboard themselves. The lecturer can sit at the computer, with the student at the whiteboard, and the class offering suggestions and contributing ideas.

Group interaction

Interactive whiteboards promote group discussion and participation. They are an effective tool for brainstorming as notes made on the screen can be turned into text, and saved to be shared and distributed later. They are an ideal tool for small group work and collaborative learning, as students can huddle around the board developing ideas, and then save the work for sharing over a network or by email.

An interactive whiteboard (IWB) is a large interactive display in the form factor of a whiteboard. It can either be a standalone touchscreen computer used independently to perform tasks and operations, or a connectable apparatus used as a touchpad to control computers from a projector. They are used in a variety of settings, including classrooms at all levels of education, in corporate board rooms and work groups, in training rooms for professional sports coaching, in broadcasting studios, and others.

Classroom applications for using interactive whiteboards include:

Multimedia lessons and presentations including audio and video

Collaborative problem solving

Showcasing student projects and presentations

Virtual field trips

Recorded lessons that can be used by substitute teachers

Documentation of student achievement

Classroom uses

1. In some classrooms, interactive whiteboards have replaced traditional whiteboards or flipcharts, or video/media systems such as a DVD player and TV combination. Even where traditional boards are used, the IWB often supplements them by connecting to a school network digital video distribution system. In other cases, IWBs interact with online shared annotation and drawing environments such as interactive vector based graphical websites.

2. Brief instructional blocks can be recorded for review by students — they will see the exact presentation that occurred in the classroom with the teacher's audio input. This can help transform learning and instruction.

3. Many companies and projects now focus on creating supplemental instructional materials specifically designed for interactive whiteboards. Electro kite out of Boston, MA, for example, will have the first complete curriculum for schools and districts.

4. One recent use of the IWB is in shared reading lessons. Mimic books, for instance, allow teachers to project children's books onto the interactive whiteboard with book-like interactivity.

Interactive Whiteboard Success Tips

Whether you’ve been using an interactive whiteboard (IWB) for years, or you’ve never turned yours on, ramp up your students’ learning with these easy-to-learn (and teach!) strategies.

1. Hold That Thought

Use a fresh whiteboard page as a blank canvas. Whether your class brainstorms a list of words that begin with the letter a, a list of endangered animals to research, or the implications of a constitutional amendment, preserve those ideas by using the IWB capture tool to save the entire page or a section of the page. Save the ink layer, then capture a screenshot that you can either print, save or post on your class website.

2. Capture the Moment

Go beyond capturing a single page when you put your whiteboard’s screen recording tools to work. Record the sequence of IWB pages used in your lesson, including audio. You can experiment with free online screen recording tools such as Jing, Screencast-o-Matic, Snipping Tool for Windows or Sketch for Mac users. Students can even capture what they’re doing on their own screens, then you can create and embed a video of their work into your IWB lesson. For a biography unit, students might work individually or in small groups to create digital posters highlighting their subjects’ achievements. Gather their work into a video to use in another lesson, on your class or school’s website or to share at a special parent night.

3. Ready-Made Lesson Plans

Interactive whiteboard manufacturers provide online resources and ready-made lesson plans for teachers by teachers. (Check out the SMART Exchange, for example, or Promethean Planet.) Need lessons that meet STEM or Common Core standards? They’ve got them. Or you can peruse their lesson banks by state standard, subject or skill to match the needs of your students.

4. Try a Template

Use one of the many ready-made templates to fit your objectives. Graphics, sounds and special effects are ready to go; all you need to do is plug in math fact families, poetic figurative language or test review questions for a rousing round of classroom Jeopardy. You’ll also find classroom management templates for tasks like taking roll and recognizing positive behavior. Pay it forward by sharing your own templates at the teacher hub on your IWB manufacturer’s site.

5. Learning Styles

Perhaps the biggest advantage interactive whiteboards offer is the ability for your students to interact with the subject matter and manipulate objects right on the whiteboard. Kids are naturally drawn to technology, and they’re highly motivated by the idea of using an IWB. Research shows that kids learn best when lessons cater to a variety of learning styles. IWB lessons that get kids up and out of their seats appeal to kinesthetic learners. Emerging writers can turn their fingers into virtual pens and practice writing words in colors and patterns, or older students can draw arrows and label the parts of a chemical compound. With sound recording tools and imbedded sound-effect files, auditory learners benefit, too. But you don’t have to choose one learning style over another; combine a variety into the same lesson. Kids can draw a queen bee, label the body parts, add animation and add a buzzing sound as their bee “flies” across the screen.

6. In the Spotlight

On a regular white board, you can write notes and draw diagrams to make your point. With your IWB, take it a step further with tools that help you hone in on important elements in your lesson. Shine the spotlight tool on a capital city on the map, slide the screen shade line-by-line to reveal text as you read, or highlight helping verbs with your finger. You can also create boxes that hide text and images to reveal later in your lesson. Sections of the board can be magnified to draw attention to specific elements of your lesson such as graphs, key words or images.

7. Enhancing Video

Take video clips that you’re already using and let students use interactive whiteboard tools to solidify their learning. Pause a stop-motion video of a growing flower and label the parts of the flower as they emerge. Capture each page with labels to create a virtual or printed class book. Or pause a clip of the Nixon-Kennedy debate after a provocative sound bite from one of the candidates, and let students draw a thought bubble to illustrate what the other candidate might be thinking of his opponent’s last comment. Check out Learn360, United Streaming and Teacher Tube for educational video clips that can enhance your lessons.

8. Cast a Web

Imbed Web links into your lessons to bring academic concepts to life. If you’re teaching research skills, include a link to one of the online databases that kids will be using. If your students are learning about George Washington, link an image or block of text to an online virtual tour of Mount Vernon, Washington’s home. Before introducing students to “The Diary of Anne Frank,” link to a virtual tour of the home that was her hiding place during the time that she wrote her diary.

9. Distance Learning

With a wireless pad and pen, you can now control your interactive whiteboard from anywhere in the classroom, so there’s no need to turn your back on the class as you teach. You can download an app like Tether to turn your iPad into a remote controller for your IWB. Students can draw or write on iPads with IWB tools using apps such as Ink2go or one from your IWB manufacturer. Let you students use these tools to demonstrate understanding of math problems, label parts of a simple machine or ask a question for you or their classmates to answer.

10. Random Generator

Mix things up with one of the many random generator tools on your IWB. Instead of always calling on students who raise their hands, make sure everyone has a voice. Enter students’ names ahead of time in a random name generator, then choose students as their names come up. You can also use this tool to assign groups randomly for quick activities. Use two generators simultaneously to assign classroom jobs—one with students’ names, and the other with job titles. Subject-area content can also be used to generate random numbers, words, musical notes, etc. Play “Whose Words?” when students touch the generator to reveal quotes from characters in fiction, or race to come up with as many ways to create a number sentence for a given number.

11. It’s a Match

Easily create matching and sorting activities with words, images or both. Gauge students’ background knowledge on a topic by letting them explore quotes from famous speeches and matching them to their sources. Check understanding during a lesson or a small group activity by having students sort prime and composite numbers into a T-chart. Gather formative assessment data by asking students to match the causes of the American Revolution with their immediate and long-term effects.

12. Cloning

Not only can students manipulate objects on the IWB, but the objects can be cloned to use again and again. Set up different shapes at the bottom of the screen that you can “infinitely clone,” which will lock them into place so that they can’t be moved. Students can then touch a shape and drag, which pulls the identical shape to another part of the board, while the original stays put for use elsewhere in the pattern. Turn this same concept into a bar graph or pictograph. Infinitely clone a circle, square or even individual headshots of the students and have them move one onto a graph to show a favorite activity, birthday month or results of a mock political election. For foreign language classes, set up and infinitely clone text boxes with definite articles and let students drag these next to the appropriate nouns.

13. Back to Class

Interactive whiteboard sites often post webinars or online self-paced training to help you get the most out of this new technology (check out the options at SMART and Promethean). Use your newfound knowledge to spread the wealth of knowledge in your school or district, and beyond.

Advantages of Using Interactive Whiteboards

Here are 3 key advantages of using interactive whiteboards in a classroom setting:

1. Improved Learning

While some students are auditory learners, absorbing information efficiently through the spoken word, others are visual learners. Interactive whiteboards give people the opportunity to absorb information in multiple formats. This helps increase retention and synthesis of information.

2. Increased Participation

Interactive whiteboard images can be saved and printed, so students do not have to take notes during the discussion. This allows them to participate in the learning or collaborative session at a more focused, engaged level.

3. Enhanced Collaboration

By integrating an interactive whiteboard into your learning or office environment, you can encourage participants to collaborate in a shared work area. This allows students to become part of the process, rather than simply recipients of prepared information

Primarily, interactive whiteboards allow teachers and students to give presentations created on a computer in class and at parent/teacher/student conferences.

Teachers can create videos to teach students different types of software in class or online. Presenters can take notes directly into PowerPoint presentations, and students can learn keyboarding from whiteboard demonstrations. Instructors can show students how to use the Internet and get information from interactive web sites.

We can also help you integrate Interactive Whiteboards with your existing Videoconferencing systems, contact us for more information.

Advantages of Interactive Whiteboards:

· Clear graphics

· Interactivity for teachers and students

· Projection of computer images on a larger screen for audience viewing

· Manipulation of computer functions while standing (rather than from the computer)

· Incorporation of video and images into traditional teaching lessons

Disadvantages of Interactive Whiteboards:

· Expensive

· Require specific software

· Require extra training for teachers

· Touch sensitive board has limitations; sometimes is not sensitive enough

· Speakers are not loud enough sometimes

6.SMART BOARD

The Smart Board is an interactive whiteboard that uses touch detection for user input (for example scrolling and right mouse-click) in the same way as normal PC input devices. The Smart Board 800 series interactive whiteboard introduced a 'flick and scroll' feature.

The Smart Board (stylized as "SMART Board") is a line of interactive whiteboards produced by the Calgary, Alberta-based company Smart Technologies.

The Smart Board is an interactive whiteboard that uses touch detection for user input (for example scrolling and right mouse-click) in the same way as normal PC input devices. The Smart Board 800 series interactive whiteboard introduced a 'flick and scroll' feature.

The Smart Board interactive whiteboard operates as part of a system that includes the interactive whiteboard, a computer, a projector and white boarding software - either Smart Notebook collaborative learning software for education, or Smart Meeting Pro software for business. The components are connected wirelessly or via USB or serial cables. A projector connected to the computer displays the desktop image on the interactive whiteboard. The whiteboard accepts touch input from a finger, pen or other solid object. Smart Board interactive whiteboards are also available as a front-projection flat-panel display – interactive surfaces that fit over plasma or LCD display panels.

A number of teachers may not be aware of the benefits of using a Smart Board in the classroom as a teaching tool. While the traditional white board already has everyone’s attention, the electronic device is a new technology that is slowly gaining popularity due to its interactive power.

The digital screen allows images from the computer to be displayed on a board7. It can also be modified on the screen itself, using a pen or a highlighting tool. Its touch screen feature allows teachers to run programs directly from the screen simply by tapping the application with her finger and even makes scrolling easy.

Smart Boards are becoming an essential component of every classroom. Some reasons for this trend is that:

§ It can accommodate different learning styles. Tactical learners can use the screen and learn by touching and marking at the board, audio learners can have a discussion and visual learners can observe the teaching on the board.8

§ It is neater and does not have the cleanliness hassle and is therefore easier to maintain.

Most teachers understand the “why” but struggle with the “how”. Here are some ideas on how you can use Smart Boards.

§ Use it as a tool for note-taking. Students can come and write important points on the board. Alternately, you can appoint a student to type out notes on the computer while you talk, so that the other students can view and take them down.

§ Brainstorming in the classroom can be fun with a Smart Board. You can not only put together text/ ideas but also images, diagrams or videos.

§ Classroom games can be played with ease on the board. Board games in particular can be played on the board itself.

§ All forms of media– videos, photographs, graphs, maps, illustrations, games, etc. – can be used on the board, making it incredibly dynamic in nature. This expands the range of content that you can use for teaching or presenting new information.2

A lot of new software is available for free on the internet that can be easily integrated. There are many forums and websites that aim to help teachers by providing Smart Board ideas and activities. Explore these for more ideas.

The Smart Board is tomorrow’s technology and is bound to change the look of classrooms forever. Using smart boards in your classroom can help you stay ahead with technology that could make the education process simpler and perhaps even more productive.

THE ADVANTAGES OF SMART BOARDS IN THE CLASSROOM

SMART boards put simply, are a sophisticated replacement of the traditional overhead projector. Over the years, this cutting-edge technology has proved popular for students of all ages. The interactive board turns a typical classroom into a fun learning environment. It enriches classrooms in several ways by providing hands on collaboration and creating the perfect learning setting.

There are several advantages of bringing in a SMART interactive whiteboard into a classroom setting. Here are the top 8 advantages of this state-of-the-art technology in the education industry.

The Top 8 Reasons why SMART Boards are an essential component in the modern day classroom:

1. Provides Flexibility: Interactive whiteboards allow many different forms of media – including photos, illustrations, maps, graphs, games, and video, to be displayed. These tools not only enrich the classroom experience but also help to expand the nature of content that can be used in learning. In addition, SMART Boards makes learning to be more dynamic owing to the different forms of presenting information.

2. Enhanced teaching/learning experience: SMART Boards provide new ways for teachers to teach, and student to learn. These tools support a wide variety of learning styles. For instance, visual learners can watch as their tutors use the whiteboards to project visual elements, whereas audio learners can listen. and have discussions on the other hand, the Boards come with touchscreen capabilities that allow tactile learners to touch and interact with the board.

3. Interact and share: The interactive nature of SMART boards offers learners an opportunity to share and participate in the instructional process. Interactivity provides a platform for students to demonstrate their grasp of the subject through touching, drawing, and writing. Every learner has an opportunity to participate or contribute to the presentation and/or discussion via notebooks and tablets. In addition, the boards provide for rapid assessment whereby learners can receive immediate feedback. Teachers and students are able to identify individual strengths and weaknesses in various subject areas and isolate areas/topics that need more focus or review.

4. Low-Maintenance: SMART Boards are neat and easy to use. There are no hassles cleaning or maintaining whiteboards. The data on the screen can be modified using a specialized highlighting tool or pen. There is no need for using unhygienic chalk or marker pens.

5. Access to online information & tools: SMART boards allow learners to easily access a rich database of online resources. Teachers can use the wide variety of online information sources such as knowledge databases, online video and news items to reinforce their lessons. Learners can also quickly access the wide range of powerful tools and resources to conduct research and supplement their usual study material.

6. Going Green: Interactive boards are also environmentally friendly. They offer teachers an entirely different way of presenting information to students, which eliminates the need for writing, printing or photocopying. Which, contribute to eliminate waste and pollution, from over-utilization of paper and ink.

7. Technology Integration: SMART boards allows for integration of various technologies in order to improve the learning experience. For instance, it is possible to attach tools such as microscopes, document cameras, cameras or video cameras to a whiteboard to aid in instruction. It is also possible to integrate the interactive learning tools with a wide range of software applications.

8. Communication: Interactive whiteboards allow for connectivity in different locations; making ideal collaboration and distance learning environments. When using SMART boards, student show to increase student-to-student collaboration and increase overall participation in the lesson.

Tuesday, 21 February 2017

I am Teacher.....!!!!

*I'm a teacher..............*

Behind that doctor,
It's me, a teacher...........

Behind that economist,
It's me, a teacher..........

Above those astronomers,
It's me, a teacher..............

I carry the light even though they mostly make jokes of me...........

But I am a teacher........

I don't qualify for a bungalow or a villa nor earn enough to buy an expensive house or a car.............like corrupt officers and corrupt politicians.

But yes, I am a teacher...........

Some think or even say that I have too many holidays, never knowing that I spend those holidays either correcting papers or planning what and how I'm going to teach when I go back to school/college/Institution........

Because I am a teacher..,

Sometimes I get confused and even get stressed by the ever-changing policies over what and how I have to teach.......

Despite all that, I am a teacher and I love to teach and I'm teaching.............

On pay-days I don't laugh as corrupt officers and others do, but by the next day I love to come with a smile to those that I teach...........
Because I m a teacher....

The main source of my satisfaction is when I see THEM growing, succeeding, having all those assets, bravely facing the world and its challenges,

and I say yes I've taught in spite of living in a world opened by Google..

Because I am a teacher....
Yes I am a teacher........

It doesn't matter how they look at me,

It doesn't matter how much more they earn than I DO.

It doesn't matter that they drive while I walk
because all what they have is through me,

A teacher...

Whether they acknowledge me or not...... 

*I am a teacher....*

Pass this to all the teachers and make them proud  of their career.🎓🎓

Dedicated to all the amazing teachers 👏

Saturday, 11 April 2015

Leading from within

Natasha Badhwar
  • Jyoti Devi, a Dalit student of std. V and President of the Bal Panchayat, conducts a student council meeting in her primary school. Photo: Natasha Badhwar
    Jyoti Devi, a Dalit student of std. V and President of the Bal Panchayat, conducts a student council meeting in her primary school. Photo: Natasha Badhwar
  • A mid-day meal of chappatis and a curry of soya nuggets and potatoes in the school verandah. Photo: Natasha Badhwar
    A mid-day meal of chappatis and a curry of soya nuggets and potatoes in the school verandah. Photo: Natasha Badhwar
  • Morning Assembly in the Primary School, Village Bada Lewa, Hamirpur, Uttar Pradesh. Photo: Natasha Badhwar
    Morning Assembly in the Primary School, Village Bada Lewa, Hamirpur, Uttar Pradesh. Photo: Natasha Badhwar

The application of the 2010 RTE Act leaves much to be desired. But the initiatives at the primary school in Bada Lewa village, Uttar Pradesh, inspires optimism.

They call it tracking. A group of 12-year-old students of the Primary School in Village Bada Lewa, Hamirpur, walk into their village during school hours, looking for children who are enrolled but have not been coming to school regularly. They will counsel the parents and get the children to attend school regularly and offer support and solutions where required. The word ‘tracking’ is now part of their everyday vocabulary.
On one such tracking mission, Jyoti, Dharam, Gomti and three others have a list of five absentee students whose homes they will visit. They run into seven-year-old Anjali, wearing her school shirt and balancing her younger sister on her hip. Jyoti takes the lead in confronting Anjali’s grandfather who is sitting in the verandah.
“Dadaji, why haven’t you sent Anjali to school today?”
“It is harvesting month. Anjali’s mother is away in the fields. She has to look after her younger sister.”
“Dadaji, Anjali will miss too much in school and then she won’t be able to catch up. Why don’t you handle the baby till the mother returns?”
“I can’t handle the baby.”
“You are our elder, Dadaji,” Jyoti reasons. “Anjali is still a small child. She needs to be regular in school. Please help her to go.”
“Whose child are you?” the old man asks, trying to place Jyoti.
She names her father. She tells him where her home is. One of the boys in the group is patting the buffalo. Eventually the elderly man asks his grandchild to run along to school. He nods approvingly at the children, who seem to be ushering in a new age in the village. The children move on to the next home on their list.
This government-run Primary School in Hamirpur district in Uttar Pradesh is one of the eight per cent of schools in India that comply with most of the norms and standards stipulated in the RTE Act. The RTE Act that came into being on April 1, 2010, casts a legal obligation on the Central and State Governments to implement the fundamental right of children to free and compulsory education. It lays down detailed guidelines for the development of curriculum, training of teachers and pupil-teacher ratios. Furthermore, it emphasises child-centric and child-friendly learning and an environment that is free of fear, trauma and anxiety for children. It has been exactly five years since the RTE Act came into being, and only a fraction of its promise has been fulfilled across the country.
Even that fraction throws up impressive statistics: 110 million children are served meals in the mid-day meal scheme making it the world’s largest school-feeding programme; 199 million children are in schools and studying. A study by the Azim Premji Foundation, quoted in the report released by the RTE Forum recently, shows that in semi-urban and rural areas, the belief that private school education is better than government schools is a myth. This was reflected in the experience of the parents in this village in Hamirpur too.
Gurudayal is the President of the School Management Committee in the Bada Lewa school. This committee comprises parents, teachers, elected members of local government and educationists or NGO workers from the area. They meet once a month to oversee the infrastructure and administrative needs of the school.
Gurudayal contrasts the present scene in the school where children of all castes sit together, as they are served meals, to a decade ago when the Dalit teacher in the school was not even allowed to sit on a chair throughout the day. He reiterates that parents in the village have taken their children out of local private schools and enrolled them in the government school because the quality of education has improved tremendously. “Don’t even ask me about the time when I was studying in this school,” he says. “Times have changed dramatically now.”
Just like the School Management Committee is a voluntary body of adults, all the children of the primary school are members of a Bal Panchayat that meets once a month to discuss their issues. The students who go tracking in the morning are leaders of the Bal Panchayat. Aided by their teachers and trained in workshops conducted by Samarth Foundation, an NGO based in Hamirpur, these children are encouraged to be assertive and proactive about addressing and fulfilling their needs.
Jyoti Devi and Gomti Devi are President and Vice President respectively of the Bal Panchayat. They have travelled to Lucknow to attend workshops organised by Oxfam where they learnt how to set agendas and follow up issues when they conduct meetings. Other posts include Education Minister, Cleanliness Minister and Mid-day Meal Minister.
The students make a list of infrastructural needs like a broken tap and an open window that needs the panes restored. They reiterate the four rights of children as laid down by the Convention for the Rights of Children and talk about the duties and responsibilities of students in the school.
Spending time in the school and village of Bada Lewa inspires an optimism for the outcomes that are possible when parents, teachers, local authorities, non-government and state agencies come together on a small scale to invest in making quality education a reality for their own children. Almost everyone in Bada Lewa village has a version of the before and ever since RTE norms have been enforced in this primary school.
The nationwide scorecard on implementing the RTE Act leaves much to be desired. Six million children are still out of schools and 75 per cent of them belong to Dalit, tribal and Muslim communities. The most deprived and marginalised communities have received the least benefits. Half the children who enrol in schools still drop out before Std. X.
Deepak Xavier leads the Haq Banta Hai Campaign at Oxfam India that is campaigning for full implementation of the RTE Act along with the RTE Forum. “Education is the greatest equaliser against inequality. By ensuring full implementation of the RTE Act, we can achieve both quality education for all children and a reduction in inequality,” he says.
India is going to be the world’s youngest country by 2020. The Kothari Commission recommended in 1966 that public spending on education needs to be at least six per cent of the GDP in 20 years. Today, nearly after 50 years of accepting this recommendation, public spending on education has been stagnant at three per cent for the last 15 years.
The RTE Act is substantial and well thought out but it needs the will of the state and sustained resources to be implemented to its full potential. The children of Bada Lewa village, tucked away between the Yamuna and Betwa in Bundelkhand, are a fine example of how empowering and well received the benefits of the RTE Act are.
When asked if they are scared of speaking up before their teachers, 12-year-old Dharam Singh, says in a small voice, “Yes, I am.” After a pause, he adds, “But our teacher says, ‘Don’t be scared of me. I have no right to hurt you. I will not hurt you’.”
Natasha Badhwar is a film-maker and a columnist. natasha.badhwar@gmail.com.

thanks  to  The  hindu

For  Students   wellfare...
Loving  a.siva...
 

Wednesday, 11 February 2015

LOVE YOU MUST ! ...


Don't be hard- hearted
But learn to love
Does not matter , whom you do love
Only remember this :


When you love your near and dear
That si ignorance.
When you love objects of 
Enjoyment that is infatuation.
When you love the poor, 
And the needy, that is compassion.
When you love God
And the prophets that is devotion.
When you love the whole world as 
your family  that is  wisdom.


Swami Srikantananda....

For my well wishers....
With Love
a.siva...

DO YOU REALLY LOVE !.....


Those who say " I love"

Know not what love is 

Those who love out of fear

Can never love their near and dear

Those who love for selfish  gain

Must get only sorrow and pain 

Love that will never expect

In return gets love and respect.

Love that embraces one and all

Alone can hear the divine call

When it transcends the limited self

It gets lost in the Supreme Self.


Swami srikantananda....

for my  well wishers....

With Love 
a.siva....

Sunday, 2 November 2014

THE WORDS THAT WORK MAGIC.....


1.Well done ! very good ! Excellent work! How  nice!


2.I am happy you are here.


3.I am very proud of you.


4.You are great!


5.Keep it up !


6.I knew you would make it.


7.You are clever, Talent !


8.Congrats! It's  Beautiful !


9.You have done wonderfully well!


10.You can! And you will make it !


with love
a.siva....

Tuesday, 21 October 2014

Happy Deepavali...


WISH YOU 
HAPPY
AND 
JOYFUL
DEEPAVALI
GREETINGS 
TO
ONE AND ALL....


WITH LOVE 
A.SIVA....

Sunday, 5 October 2014

Important Tips for Studying Mathematics

Go To Class Regularly:
Remember that math is cumulative. If you don’t go to class you will miss important material that will be used in later sections and important announcements.
Get to Class On Time.
Sometime important announcements are only given during the first few minutes of a class.
LISTEN During Class.
In order to get something out of the class you need to listen while in class. Often this can be difficult to do but it is very important. Sometimes important ideas will not be written down on the board, but instead just spoken by the teacher.

Watch for things the teacher emphasizes, even if just in words. This often means the teacher thinks it’s important. The more important that  teacher thinks a topic is, the more likely that it will show up on the exam!
Take Good Notes.
Try to write down everything that teacher puts on board. It may seem easy when watching the teacher, but it often is not so easy when it comes time for you to do it. A good set of notes will help remind you how to do these problems. For some teacher writing down everything may be difficult. In these cases you should try to write down as much as possible.

Note as well that this seems to contradict the previous tip. It is often hard to both listen and take a good set of notes. This is something that one often only gains with practice. You need to be able to listen while you are writing down the important parts of the lecture.
Ask Questions.
If you don’t understand something then ask your teacher. Chances are you are not the only one who doesn’t understand.
Listen When Others Ask Questions.
When other students ask questions make sure you listen to both the question and the answer. It may be that the student asking the question thought of something that you didn’t think of.
Review Notes After Class.
After each class you should review your notes. Note the topics that you found confusing and formulate questions that you can ask your teacher or tutor to help you understand the topic.
Make a Set of Index Cards.
Make a set of index cards with important formulas and concepts on them. You can carry these around with you to look over when you’ve got a few spare minutes. Use them to help you memorize the important formulas and concepts.
Note Due Dates. Write down the due dates for homework and dates for exams someplace you’ll see them so you don’t forget about them.
Budget Adequate Time For Studying/Homework. It often takes more time studying mathematics to learn the subject than you may require in other classes.

Do Homework After Each Class.
At the end of each class budget some time to look over the homework from that days lecture and attempt to do it Doing this will allow you time to really work at understanding the concepts covered that day. Do not wait until the last minute to do the homework as this often results in an incomplete homework set and an incomplete understanding of the concept.
Do Homework Without Notes and Book.
After the first few homework problems, put your notes and book up and try to do the remaining problems without referring to your notes and/or book. In most cases you will not have these during your exams so get used to doing problems without them.
Do More Homework.
Do not limit yourself to just the homework that your instructor assigns. The more problems that you work the better off you’ll be.
Practice, Practice, Practice.
Practice as much as possible. The only way to really learn how to do problems is work lots of them. The more you work, the better prepared you will be come exam time.
Persevere.
You will not just instantly get every topic that is covered in a math class. There will be some topics that you will have to work at before you completely understand. The only way to really grasp some topics is to go home and think about it and work some problems. You will often find that after a little work a topic that initially baffled you will all of a sudden make sense.
Keep Old Homework and Exams.
Do not throw away homework and exams once you get them back. The homework is a good source of study material for exams and both the homework and exams is a good source of study material for comprehensive final exams (if you’ve got one).
Don’t Forget Your Textbook.
If you get stuck on a topic that was discussed in class do not forget that you do have a textbook. Often the text book will contain examples not worked in class and/or a different approach to a problem.
Seek Help If You Need It.
If you are having trouble with your maths class you have many options open to you and you should take advantage of them. You can go to your tescher’s office hours, go to the tutoring room or hire a tutor to get help.


yours loving

a.siva...

Monday, 8 September 2014

SNACKS FOR MIND


It is better to sleep

Than to slip

For the one gives you rest

The other fall from the best.


Don't be in a hurry

But postpone indefinitely

Your wrong motives, selfish desires

And immoral activities

That is the only way to eascape

From the fury of worry.


with love

siva...

Friday, 5 September 2014

TEACHER! THE ROLE MODEL


I don't  care for praise or blame
I try my best
Without caring for gain.

I take it as a challenge
To serve my friends
I want them all to be 
Wonderful gems.

I prepare my notes
with lots of  pain
To give something new 
Is always  my aim.

I love my students
And  never use a care
No cheap talk
For personal fame.

I use my time 
To enlighern them
I put moral values
In tender brains.

I don't know why 
Students respect me well
I feel prould seeing them
Hearty  and hale.

Without a role model
Teaching is in vain
Only what I practise.
That's all I tell them.

I am proud to be called
A " torch bearer" " nation builder"
on my sincere efforts
depends India's future

I am greateful to God for 
Making me a teacher
A teacher is compared to 
Braham, Vishnu,Maheshwar.
 
 with Love
siva.....

Thursday, 22 May 2014

A STUDENT SAYS....


"If you  touch me soft  and gentle,


If you look at me and smile at me,


If you listen to me  and then talk to  me,


I will grow really  grow."


WITH LOVE
a.sivaramakrishnan...

Wednesday, 21 May 2014

MY HANDWRITING - Mahatma Gandhi....


"When I saw the beautiful  handwriting 

 of lawyers and young men born  and  

educated in South Africa,

I was ashamed  of myself  and 

repented  my neglect.  

 I  saw that bad handwriting  should be 

regarded  as sign of imperfect  education.....

Let every  young man and woman  be

 warned by my   example,   and  

understand that 

good hand writing is a necessary  part of  education.

                                                       MAHATMA   GANDHI.


WITH  LOVE
a.sivaramakrishnan...

WHAT ARE THE SINGNS OF ACTIVE LEARNING?...


1.by keeping their eye contact.....


2.by body language..... position and  shift while sitting, standing, writing ,  etc.....


3.movements of the hand,  mouth,  facial  expressions.....


4.making sounds like  um,... yes.....  o.k.,.... we understand ,  that is right


5.asking questions,   answering  questions.....


6.taking  notes.....


with Love
a.sivaramakrishnan...


Tuesday, 13 May 2014

Writing in Kindergarten


Opinion

In one of the kindergarten classrooms I’ve been working in, we’ve been learning:
Writers share their opinions.
This has been a unit of study inspired by the Common Core State Standards, which place a heavy emphasis on opinion writing. What does that look like in kindergarten, I wondered. So I’ve been trying out a few teaching points, then observing what five and six year olds can do.
I wasn’t sure if it was even appropriate to ask our youngest writers to share their opinions with words and pictures. After the first lesson, I knew even more scaffolding would have to be put in place. We worked with students to understand what an opinion was. We provided ideas for topics. And we watched.
They began to move from story to facts to opinions. Then they moved from mimicing our opinions, to one another’s opinions, to their own opinions. Today I taught:
Writers support their opinions with reasons.
Mentor Text by Hunter used during the minilesson. This is his fourth page, supporting his opinion that "Fishing is fun." (I like to bait my hook with a worm and a minnow and that is not all, you can bait a lure!)
I wondered if I needed my head examined for giving this lesson in kindergarten. I consoled myself, remembering some of the writers had already moved to offering support for their opinions. I used student writing as a mentor. We practiced writing in the air with partners in the meeting area. Then off they went to write.
I was amazed. (I don’t use that word lightly.) Their work is remarkable. Almost everyone was sharing an opinion with their pictures and words. Many had moved to support their opinions. The topics were their choice, not driven by a prompt. It was things they cared about; things that mattered to them. I collected a handful from students who said they were finished today. (I’m dreaming up a digital celebration to share at the end of this unit.) So I scanned some of them. I’m just so excited about this work, I have to share it with you.
Here are some opinions, shared in pictures and words, from some of our youngest writers.
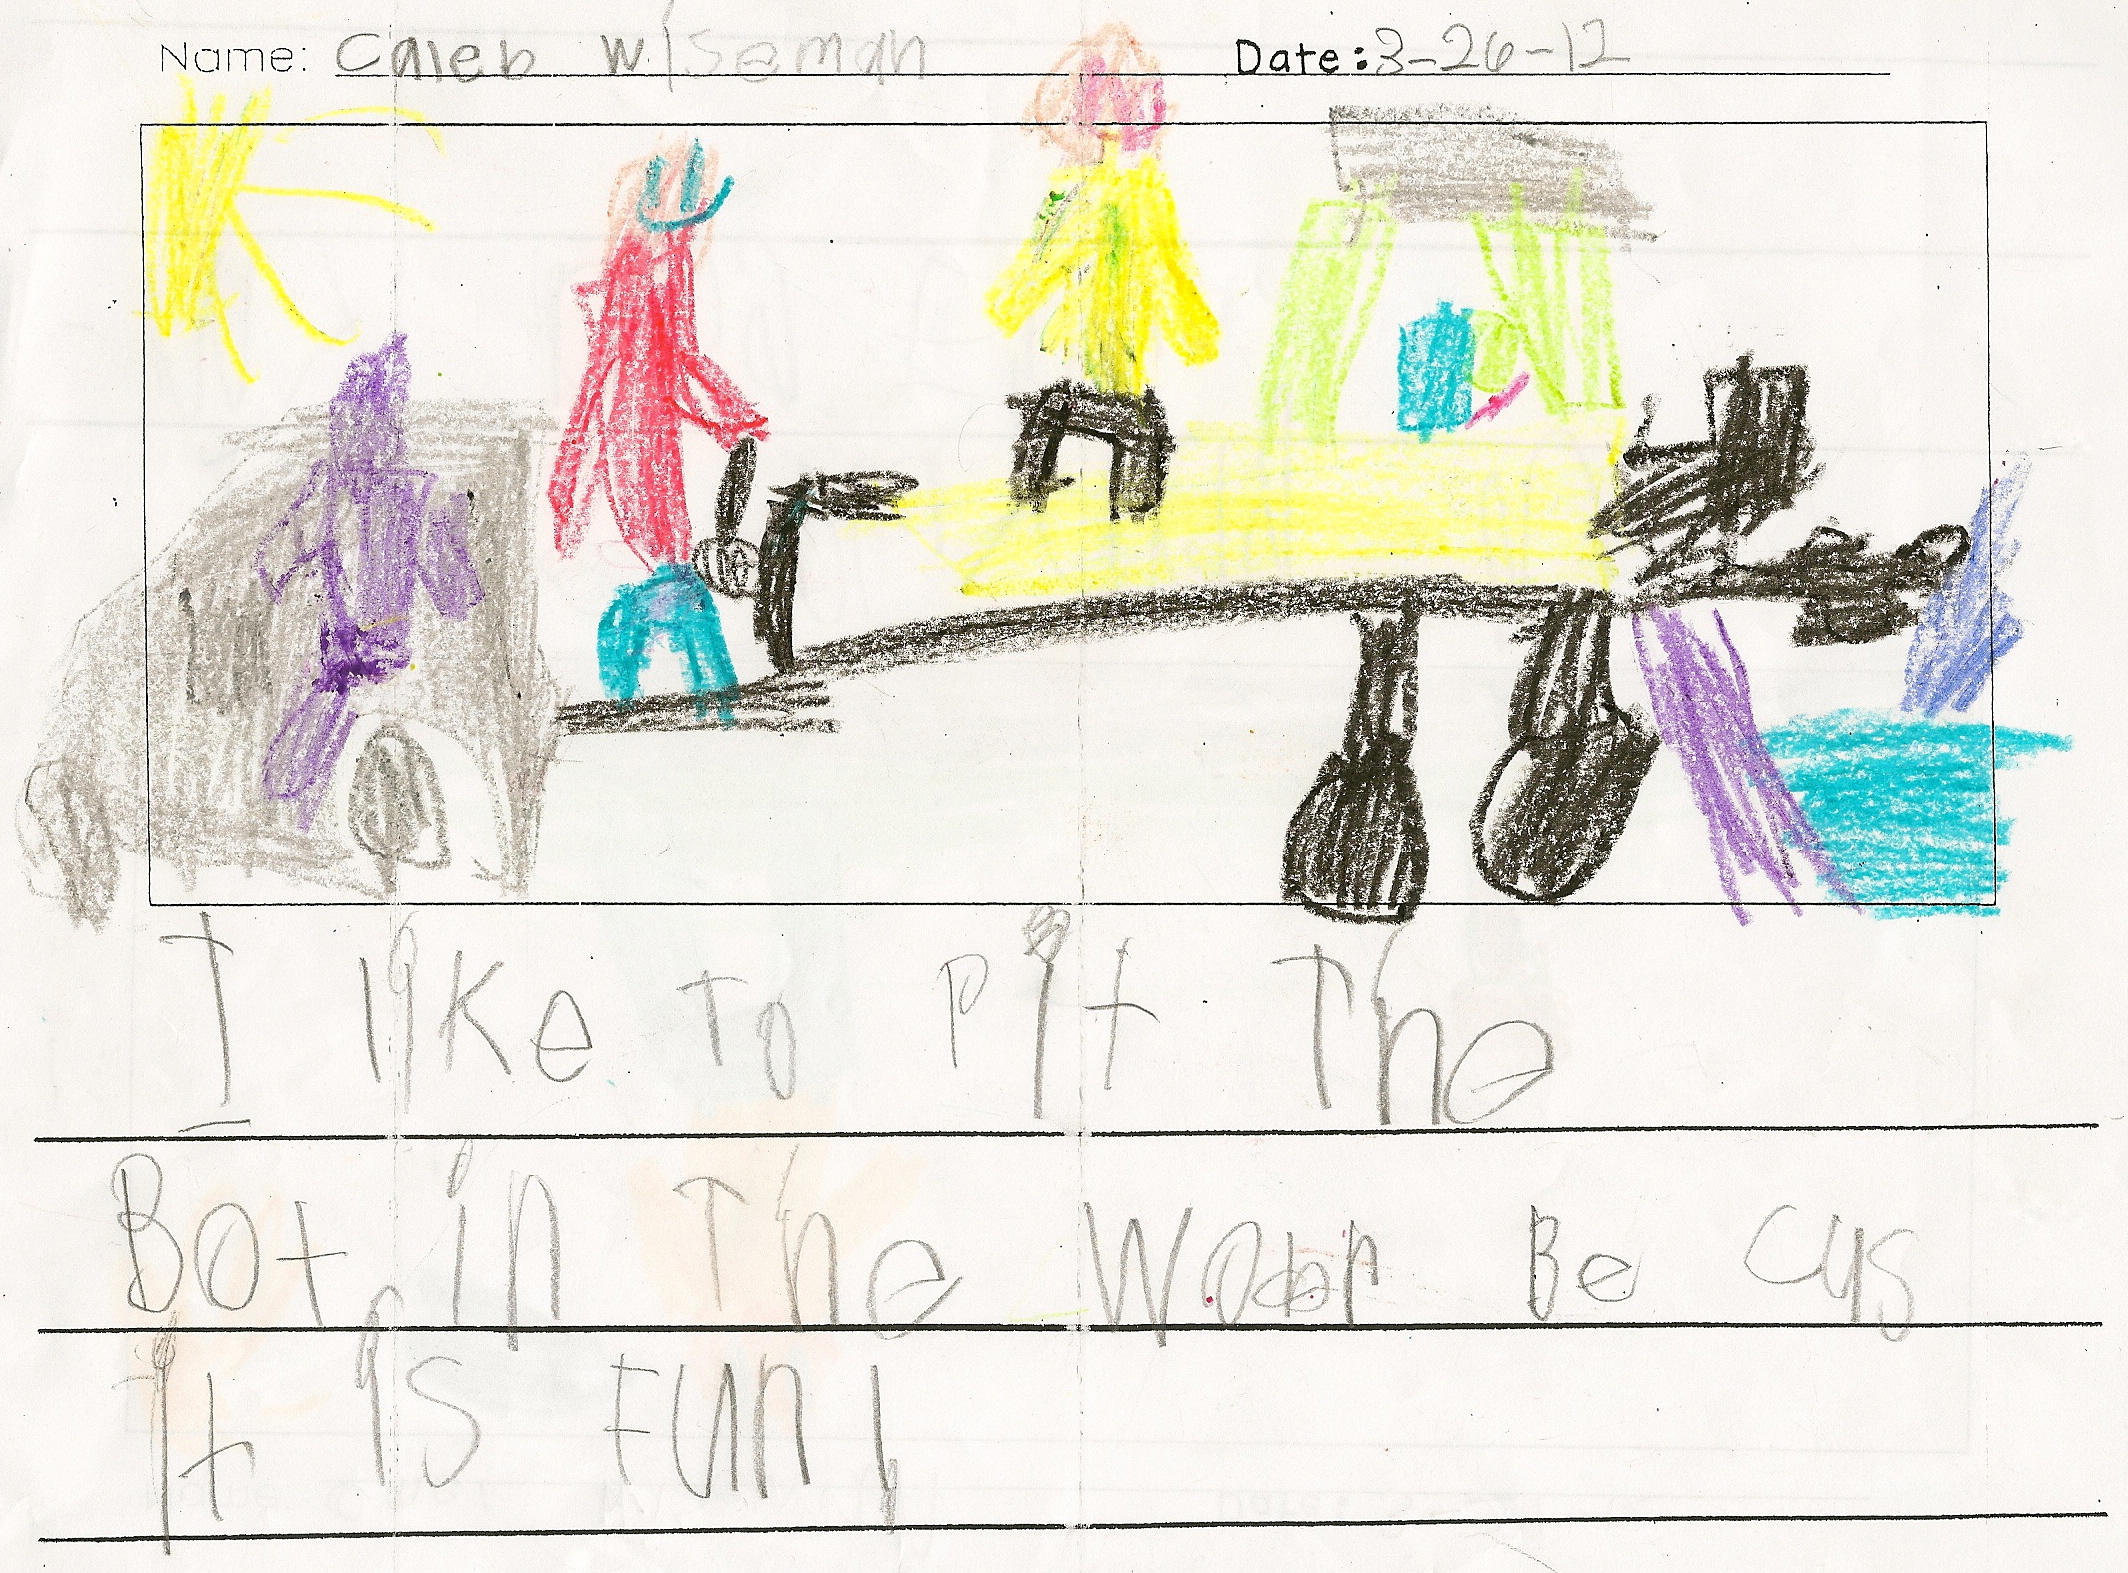
I like to put the boat in the water because it is fun!
I think the goodest food is bread sticks because you can dip them.
I think that tigers are the best animal because they jump high and they run fast.
I like to write because you can make words. Also you can be done.
Me and my dad think camping is the best because you can make marshmallows, and you can make smores, and you can make a camp fire

with love
a.sivaramakrishnan

A Quick Little Conference About Choices

All kids are working toward writing with detail--how they get there is up to them. A chart like this helps kids remember what has been taught so that they can make wise choices on their own.
All kids are working toward writing with detail–how they get there is up to them. A chart like this helps kids remember what has been taught so that they can make wise choices on their own.
I pulled a child-sized chair over to Zach and sat down next to him. “How’s it going?” I asked.
“Not good,” was his reply.
“What seems to be the trouble?”
Zach explained that he was trying to add dialogue to his story, but his story was about falling asleep on the couch with his puppy, and neither of them had said a word.
“So, why do you need to add dialogue?” I asked.
“Because the teacher said so,” Zach answered.
Now, I was a visitor in Zach’s classroom, but I went ahead and said these words, because I knew his teacher agreed:
“I think it is really important to try out what your teacher has taught, and I can tell that you really want to try everything in this story. But, the minilesson is a choice. It is not required. See our charts that list all the strategies you’ve been taught? You could use any of those strategies–not just the one that was taught today.”
A look of relief washed over Zach’s face.
“It’s okay if your story doesn’t have dialogue,” I said, “You only need to use it if you think it will make your story better.” Next, I asked Zach to reread his work, with a general checklist for narrative writing next to him. I asked him what he thought he might do to improve his story. One of the items on the checklist was I wrote in ways that help the reader picture what was happening and brought my story to life. Within a minute or two Zach decided that he could probably do more of that. I suggested that he could describe the setting with more detail to help us picture his story better.
“So, Zach, each day, after the minilesson, remember to look over all the charts in our classroom and your narrative checklist, and choose for yourself which strategies you think will help make your writing the best it can be. We all want to write stories that come alive, but each of us can do it in our own way.”

with love

a.sivaramakrishnan..


Words Come Alive


I had the pleasure of teaching a third grade class this week. A friend and colleague invited me to do a poetry lesson with her students. She expressed concerns about their ability to use descriptive language. I thought a poetry lesson was just the prescription for such a problem and we got to work. I was reminded of the two column exercise I had tried out myself just a few weeks earlier. I thought this would be a great launch pad for descriptive writing and help students to put on their binoculars and make their writing visible.
I started by sharing a poem by Jane Yolen, Crayons: A Rainbow Poem
I first read the poem by omitting the descriptive details and only read the color words. It went something like this:
This box contains blue
Green
Yellow
Orange and red.
I continued to read the poem in this way. I asked them what they saw and they remarked on the colors, like a box of crayons. Then I read the poem line by line, drawing attention to the descriptive details given to each color:
This box contains the wash of blue sky,
Spikes of green spring…
As I continued to read the poem I saw their gaze deepen a bit and they could really see the colors. We talked about this. Seeing the color “for real” as opposed to just looking at the color was different. These words were coming alive with description! Just as looking at a brown cabinet was different from really seeing the striation of the grains in the wood and the variation of the browns and golden colors that were embedded in the door frame. We talked about details and how to see them and how to get your reader to see them.
I showed them how to make two columns and we went outside. I asked students to look for general items and write down what came to them. Then we gathered back together for a moment and I asked them to go back to each item, really look it over, and find out what made it unique and interesting. They wrote this description in the second column.
photo 4 (10)
We came back inside to share some of the descriptive word choice we found while roaming the playground.  Here’s what one student had to share: Starting with the word fence, he described it like, “Silver, shiny metal tied together.”
Another student described a play structure as “mustard yellow.”
I showed the students how to make decisions about their lines. We talked about omitting some of our ideas from the final poem. Also, adding ideas or thoughts as we wrote was fine. Best of all, the poems didn’t have to rhyme!
The students wrote and we shared afterward. This student started out describing two different items, a tree and a bird, but then decided to put it together into one line because he liked how it sounded.
“Home to bugs, a feathered flyer.”
photo 2 (15)
Not only did words come alive during this lesson but little poets did too. Many of them had not written much poetry, so this was a new experience. I felt like everyone was successful in using some descriptive language and we talked about how this could be useful in any kind of writing. All of our eyes were lit up by the end of the hour and the prize was  a little poem to hold on to the memory

with Love
a.sivaramakrishnan
 

Top Ten Ways to Keep Minilessons from Turning into Maxilessons


clock-147257_640We’ve all been there. You’ve gathered your students into the classroom meeting area, nice and cozy, with the intention of doing just a quick l’il minilesson. Just a quick tip about writing and off they go, right? Maybe just a quick little demonstration? With a tiny bit of practice? Oh, and a chart… you’ll need to make a chart so that they remember the lesson, right? Oh, and maybe remind them about all the other strategies they already know? And don’t forget about their goals. Definitely remind them about their writing goals…and their writing partners…and to push themselves to write long and strong…and to use everything they know about punctuation…and spelling…and…and…and…
Next thing you know, twenty minutes have passed, and you still haven’t even got to your main teaching point, and there’s barely time for your kids to do any actual writing before they have to line up for lunch. Trust me, we’ve all been there.
If you are familiar with the Units of Study for Opinion, Information, and Narrative Writing for K-8 (Lucy Calkins et al 2013, 2014), then of course you are familiar with minilessons. But just in case you aren’t familiar, I’m referring to a particular kind of lesson structure designed to minimize whole class instruction and maximize time for independent work, conferring and small group work. There are usually four parts to the architecture of a basic minilesson:
1) a quick connection to something familiar to your students
2) a brief demonstration
3) a chance for kids to be actively engaged in trying out the work
4) and a link to ongoing student work and personal goals
This basic architecture keeps things nice and organized, grounded in research about how children learn, and efficient. The less time we spend in whole class instruction, the more time we have for individualized instruction via small groups and one-one conferences. By the way, conferring, Lucy Calkins and other experts will tell you, is the heart of a true writing workshop.
But how to keep those minilessons mini, but still strong enough for kids to understand and remember (and possibly even enjoy)? Here are my top ten bits of advice, gleaned from a decade of traveling around the country teaching reading and writing workshop:
10. State the teaching point VERY clearly. Try saying, “Today I will teach you how to ________________.” With a clear teaching point, everything else falls right into place. Don’t keep the teaching point a secret! If you aren’t used to it, saying these words out loud as part of your lesson can feel a bit canned, uncomfortable, even. But trust me. If your minilessons tend to be maxilessons, making this one small change might work magic for you–and you can always develop your own way of saying this once you get the hang of stating your teaching point clearly every time.
9. Your demonstration should clearly model the teaching point that you named. Try saying, “Watch how I ________,” before you start modeling. You don’t want kids noticing your new nail polish color instead of the strategy you wanted to teach (I am speaking from experience, here). It helps a bunch to just explicitly say what you’re modeling. No guessing games, please!
8. Be consistent about NOT indulging children’s questions and comments during your minilesson. Remind children that the minilesson will be brief and they will have their chance to talk to you in just a few minutes after the lesson (and of course make sure you stay true to your word). If you’re like me, not calling on kids is a challenge. Little Suzy has her hand up… and won’t put it down until you call on her. It’s so tempting to call on her… just this one time, right? But trust me, if you do, you’ll have three hands up during your lesson tomorrow, then six the next day, and then you might as well just cancel your minilesson because, trust me, the kids aren’t listening to you anyway when their hands are up in the air. Often at the end of my minilessons, I invite kids to stay at the meeting area if they still have burning questions.
7. A little repetition is a good thing. Naming the teaching point multiple times is good. Planning three demonstrations is not so good. Try to plan minilessons that your children will be able to understand after one demo, and one active engagement. If, while teaching, it seems too difficult, pull small groups later during the workshop, or revise the minilesson to make it more effective and try again another day. Keeping your kids at the meeting area for a half hour because “they just aren’t getting it” probably isn’t the best way to go.
6. The active engagement should involve the kids in trying the actual strategy you taught that day. This might mean that they actually write something, or help you write something, or say it aloud to a partner. Circulate during this time and coach the kids – if they aren’t doing what you asked, stop them and ask them to try again! Watching an adult do the work, or talking about what they saw isn’t the same as actually trying it.
5. Be expressive while you teach. Don’t rush through just to make it “mini,” but don’t drag it on forever either. Use a dramatic voice, gestures, and try to have fun! There, I said it. It’s okay to have fun while you teach!
4. Constantly ask yourself, “Do my kids really need this lesson right now?” Watch them while you teach – is it obvious from looking at their previous writing, or previous lessons they will understand today’s lesson before you’ve even gotten to the active engagement?” Well, get them off the carpet so they can go write!
3. Ask yourself, and be honest, is this really a strategy that kids can use every time, in almost any piece of writing? (Ahem. Overly specific graphic organizer?) If they cannot use it over and over, on their own, for any piece of writing, then what you are probably doing is giving an assignment, NOT teaching a writing workshop minilesson….just sayin’.
2. My friend Shanna Schwartz long ago taught me the cardinal principles of management: 1)Reasonable expectations 2)Teach, don’t tell, 3)Put yourself out of a job, 4)Consistency, 5) Walk the walk. Be the best student in your own classroom. Wiser words were never spoken, in the classroom and in life. And strong management is one of the most important things you can do to help keep your minilessons from turning into maxilessons.
1. Lastly, nobody wants their minilessons to be forgettable. Use visuals, like charts to help your kids remember what you’ve taught them. Try giving kids special “tools” to remind them of the really important things that they tend to forget. Use color, pictures, images. Act things out, use kids’ writing as examples, display the examples after the lesson. Use stories from your own life, metaphors and images to help kids remember, make a game of the strategy when you can… do anything and everything you can to help kids retain what you’ve taught. But don’t try to do it all in one lesson!

Monday, 28 April 2014

TEACHERS DIFFER !..


A  poor teacher - tell , reads

An average teacher- teaches

A good teacher - explain

A very good teacher - demonstrates

An excellent  and outstanding  teacher - INSPIRES.


What type of teachers are We ?...


with Love
a.sivaramakrishnan..